The Ultimate Guide to Cheese Recipes Homemade: Simple Steps for Perfect Cheesy Creations
Introduction to Homemade Cheese
Homemade cheese recipes offer a delightful culinary adventure that can elevate your cooking experience. Crafting cheese at home allows you to explore various flavors and textures while gaining control over the ingredients used. Additionally, making cheese from scratch can be a rewarding and fun project, whether you’re a seasoned cook or a novice in the kitchen. By learning the art of cheese-making, you can create delectable treats that impress family and friends.
To begin your journey into cheese recipes homemade, it’s essential to understand the basics of cheese-making. At its core, cheese-making involves curdling milk, separating curds from whey, and aging the curds to develop flavor. Many recipes require only a few simple ingredients, such as milk, salt, and an acid like lemon juice or vinegar. Moreover, the process can be surprisingly straightforward, allowing you to enjoy fresh cheese in just a few hours.
Exploring different types of cheese will also enhance your cheese-making experience. From creamy ricotta to tangy goat cheese, each variety has its unique characteristics and methods. You can even experiment with flavors by adding herbs, spices, or other ingredients during the cheese-making process. As you try various cheese recipes homemade, you will discover new favorites that suit your palate.
Finally, the satisfaction of creating your cheese is unmatched. Not only will you have a delicious product to enjoy, but you’ll also gain valuable skills and knowledge about the cheese-making process. So gather your ingredients, and get ready to embark on a flavorful journey into the world of homemade cheese!
Essential Cheese-Making Equipment
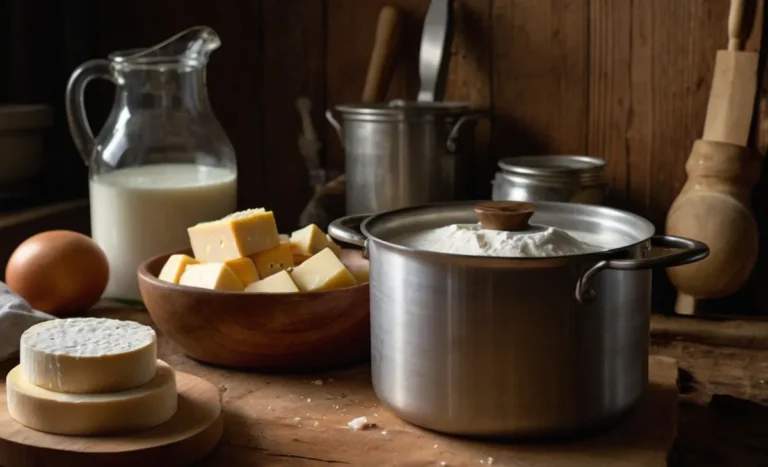
When diving into the world of cheese recipes homemade, having the right equipment is essential for achieving the perfect cheesy creations. While cheese-making can seem intimidating at first, equipping your kitchen with the necessary tools makes the process more manageable and enjoyable. Below, you’ll find a list of essential cheese-making equipment along with step-by-step instructions and ingredients to help you get started.

- Large Pot
Use a heavy-bottomed pot to prevent scorching your milk. A 4-6 quart pot is ideal for making most types of cheese. - Thermometer
An accurate food thermometer ensures you heat the milk to the correct temperature for curdling. A digital thermometer with a probe works best. - Cheesecloth
This fine mesh fabric is crucial for straining curds from whey. You can find it in most kitchen supply stores. Look for unbleached cheesecloth for the best results. - Colander
A colander helps separate the curds from the whey after cooking. Ensure it has a fine mesh to prevent small curds from slipping through. - Long Knife or Curds Cutter
A long knife is used to cut the curds into uniform pieces, allowing whey to escape during the cooking process. You can also use a curd cutter for more precision. - Slotted Spoon
A slotted spoon is essential for stirring curds and transferring them to your cheese mold or colander without losing any of them. - Cheese Mold
A cheese mold shapes the curds and helps remove excess whey. Different molds produce various cheese shapes and sizes, so choose one based on the cheese you’re making.
Step-by-Step Instructions
- Prepare the Milk
Start with high-quality milk, ideally raw or whole milk, as it yields the best results. Pour it into your large pot and heat it slowly over medium heat. Use the thermometer to monitor the temperature, ensuring it reaches around 185°F (85°C) for most cheese types. - Add Acid
Once the milk reaches the desired temperature, remove it from heat and slowly stir in your acid (like lemon juice or vinegar). This process curdles the milk, separating it into curds and whey. Let it sit for about 10 minutes to allow the curds to form. - Cut and Cook the Curds
Using the long knife or curds cutter, gently cut the curds into small cubes. Return the pot to low heat and cook the curds for about 5-10 minutes, stirring gently. This helps them firm up and expel more whey. - Strain the Curds
Place the colander over a bowl and line it with cheesecloth. Carefully pour the curds and whey into the colander, allowing the whey to drain away. Rinse the curds under cold water to cool them and remove any residual acid. - Shape and Store
Gather the corners of the cheesecloth and twist it to form a pouch. Place the curds inside and apply pressure to expel excess whey. Once shaped, transfer the cheese to a container and store it in the refrigerator for up to a week.
By gathering the essential cheese-making equipment and following these straightforward steps, you can begin your journey into the delightful world of cheese recipes homemade. Enjoy the process and savor the delicious rewards of your efforts! ✨
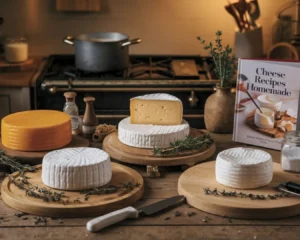
Types of Cheeses You Can Make at Home
Exploring the various types of cheeses you can make at home is an exciting journey for any cheese lover. With just a few ingredients and simple techniques, you can create a range of delicious cheeses that suit your palate. From creamy ricotta to tangy goat cheese, these cheese recipes homemade will inspire you to try your hand at cheese-making. Here, we’ll cover some popular cheese types you can easily make in your kitchen, complete with step-by-step instructions and ingredients.
1. Homemade Ricotta Cheese
Ingredients:
- 4 cups whole milk
- 1 cup heavy cream
- 1/2 teaspoon salt
- 3 tablespoons lemon juice or white vinegar
Instructions:
- Heat the Milk and Cream
Pour the milk and heavy cream into a large pot. Heat over medium heat until it reaches about 190°F (88°C). Stir gently to prevent scorching. - Add Acid and Salt
Remove the pot from heat and stir in the salt and lemon juice (or vinegar). Let it sit for about 10 minutes. You’ll see the curds and whey separate. - Strain the Curds
Line a colander with cheesecloth and pour the curds into it. Allow it to drain for about 15-20 minutes, depending on how creamy you want the ricotta. - Store and Enjoy
Transfer the ricotta to an airtight container and refrigerate. It can be used in various dishes, such as lasagna or on toast with honey. Enjoy!
2. Creamy Goat Cheese
Ingredients:
- 1 gallon goat’s milk
- 1/4 teaspoon mesophilic starter culture
- 1/8 teaspoon liquid rennet (or 1/4 rennet tablet)
- Salt to taste
Instructions:
- Heat the Goat’s Milk
Pour the goat’s milk into a pot and heat it to 86°F (30°C). Stir in the mesophilic starter culture. - Add Rennet
Dissolve the rennet in a small amount of cool, non-chlorinated water. Stir it into the milk gently for about 30 seconds, then stop stirring. Let it sit undisturbed for 1 hour until the curd sets. - Cut the Curd
Once the curd is set, cut it into 1-inch cubes. Let it rest for about 5-10 minutes, then gently stir to release more whey. - Drain and Salt
Pour the curds into a cheesecloth-lined colander and let them drain for about an hour. After draining, transfer the curds to a bowl and mix in salt to taste. Shape into a log or small rounds and refrigerate. Perfect for salads or on crackers!
3. Fresh Mozzarella
Ingredients:
- 1 gallon whole milk
- 1 1/4 teaspoons citric acid
- 1/4 teaspoon liquid rennet (or 1/2 rennet tablet)
- Salt to taste
Instructions:
- Prepare the Milk
In a large pot, combine milk and citric acid. Heat the mixture over medium heat until it reaches 190°F (88°C). Stir gently to combine. - Add Rennet
Remove from heat and add rennet. Stir gently for about 30 seconds, then let it sit undisturbed for 5 minutes until the curd forms. - Cut and Heat the Curd
Cut the curds into 1-inch pieces, then heat gently to 105°F (40°C). Stir occasionally for about 5 minutes. - Form the Mozzarella
Drain the curds and place them in a bowl. Sprinkle with salt and knead gently until smooth and stretchy. Shape into balls and place them in cold water or brine. Fresh mozzarella is delicious in salads, pizzas, or enjoyed on its own!
By trying your hand at these types of cheeses, you can experience the joy of creating delicious, homemade cheese recipes that elevate any dish. Each recipe is not only simple but also customizable to suit your tastes. Enjoy experimenting with flavors and textures as you dive into the wonderful world of homemade cheese! ✨
Basic Cheese-Making Process
Embarking on the journey of cheese-making is an exciting and rewarding experience for any home cook. With just a few ingredients and straightforward techniques, you can transform simple milk into a variety of delicious cheeses. Understanding the basic cheese-making process is essential for anyone interested in exploring cheese recipes homemade. In this guide, we’ll walk you through the fundamental steps involved in making cheese, along with step-by-step instructions and ingredients. Let’s get started!
- Gather Your Ingredients and EquipmentIngredients:
- 1 gallon of milk (whole or raw milk works best)
- 1/4 cup of an acid (like lemon juice or white vinegar)
- Salt to taste
- Optional: herbs or spices for flavoring
Equipment:
- Large pot
- Thermometer
- Long knife or curd cutter
- Slotted spoon
- Colander
- Cheesecloth
- Heat the Milk
Begin by pouring your milk into a large pot. Heat it over medium heat until it reaches about 185°F (85°C). Stir gently to ensure even heating and prevent the milk from scorching. This step is crucial for achieving the right texture in your cheese.
- Add the Acid
Once the milk reaches the desired temperature, remove it from the heat. Slowly add your chosen acid (lemon juice or vinegar) while stirring gently. You’ll notice the milk beginning to curdle and separate into curds and whey. Allow the mixture to sit undisturbed for about 10 minutes. This resting period lets the curds fully develop.
- Cut the Curds
After the curds have formed, use a long knife or curd cutter to cut them into small cubes, typically about 1 inch in size. This step helps to release more whey. Let the curds sit for an additional 5-10 minutes to firm up.
- Cook the Curds
Return the pot to low heat and gently stir the curds while slowly increasing the temperature to about 105°F (40°C). Continue cooking for 5-10 minutes, stirring occasionally. This process helps the curds expel more whey and firm up further.
- Drain the Curds
Place a colander lined with cheesecloth over a bowl to catch the whey. Carefully pour the curds into the colander, allowing the whey to drain away. Rinse the curds under cold water to cool them and remove any residual acid.
- Add Salt and Flavorings
Once the curds are drained, transfer them to a bowl. Sprinkle salt over the curds and mix well. This step enhances the flavor of your cheese. You can also add herbs, spices, or other flavorings at this stage if desired.
- Mold and Store
Gather the corners of the cheesecloth and twist to form a pouch. Apply pressure to expel excess whey. Once shaped, transfer the cheese to an airtight container and refrigerate. Your homemade cheese is now ready to be enjoyed!
By following this basic cheese-making process, you can create a variety of cheese recipes homemade that are fresh and delicious. With practice, you’ll gain confidence and discover new flavors, making cheese-making a delightful addition to your culinary skills. Enjoy the journey of crafting your cheese! ✨
Delicious Cheese Recipes to Try
Exploring delicious cheese recipes to try at home is one of the best ways to enhance your culinary skills and delight your taste buds. Whether you’re a seasoned chef or a beginner in the kitchen, these cheese recipes homemade are perfect for any occasion. From creamy mac and cheese to gourmet grilled cheese sandwiches, you’ll find inspiration to create cheesy delights that impress. Let’s dive into some delectable recipes, complete with step-by-step instructions and ingredients!

1. Creamy Mac and Cheese
Ingredients:
- 8 oz elbow macaroni
- 2 cups shredded sharp cheddar cheese
- 1/2 cup grated Parmesan cheese
- 3 cups milk
- 1/4 cup unsalted butter
- 1/4 cup all-purpose flour
- 1/2 teaspoon garlic powder
- 1/2 teaspoon onion powder
- Salt and pepper to taste
- 1 cup breadcrumbs (optional)
Instructions:
- Cook the Pasta
In a large pot, boil salted water and cook the elbow macaroni according to the package instructions until al dente. Drain and set aside. - Make the Cheese Sauce
In the same pot, melt the butter over medium heat. Whisk in the flour and cook for about 2 minutes. Gradually add the milk, whisking continuously until the mixture thickens. Stir in the garlic powder, onion powder, salt, and pepper. - Add the Cheese
Remove the pot from heat and stir in the cheddar and Parmesan cheeses until melted and smooth. - Combine and Bake
Fold the cooked macaroni into the cheese sauce. If desired, transfer to a greased baking dish and sprinkle breadcrumbs on top. Bake at 350°F (175°C) for 20 minutes until bubbly and golden. Enjoy this comforting classic!
2. Gourmet Grilled Cheese Sandwich
Ingredients:
- 2 slices of your favorite bread (sourdough or whole grain)
- 1 tablespoon butter
- 1/2 cup shredded mozzarella cheese
- 1/4 cup crumbled feta cheese
- Fresh basil leaves
- Optional: sliced tomatoes or avocado
Instructions:
- Prepare the Bread
Spread butter on one side of each slice of bread. - Assemble the Sandwich
Place one slice of bread, butter side down, in a skillet over medium heat. Top with mozzarella cheese, feta cheese, and fresh basil. If desired, add sliced tomatoes or avocado for extra flavor. - Grill
Place the second slice of bread on top, butter side up. Cook until the bottom slice is golden brown, about 3-4 minutes. Carefully flip and cook until the other side is golden and the cheese is melted. - Serve
Remove from heat, slice in half, and serve hot. This gourmet twist on a classic will elevate your lunch game!
3. Cheesy Spinach and Artichoke Dip
Ingredients:
- 1 cup cooked spinach, drained and chopped
- 1 cup canned artichoke hearts, drained and chopped
- 1 cup cream cheese, softened
- 1 cup sour cream
- 1 cup shredded mozzarella cheese
- 1/2 cup grated Parmesan cheese
- 1 teaspoon garlic powder
- Salt and pepper to taste
Instructions:
- Preheat Oven
Preheat your oven to 350°F (175°C). - Mix the Ingredients
In a mixing bowl, combine the cream cheese, sour cream, mozzarella cheese, Parmesan cheese, garlic powder, salt, and pepper. Stir until smooth. Fold in the chopped spinach and artichoke hearts. - Bake the Dip
Transfer the mixture to a baking dish and spread evenly. Bake for 20-25 minutes until hot and bubbly. - Serve
Serve with tortilla chips, bread, or vegetables for dipping. This creamy dip is perfect for parties or game day!
4. Cheese-Stuffed Bell Peppers
Ingredients:
- 4 bell peppers (any color)
- 1 cup cooked rice
- 1 cup shredded cheddar cheese
- 1 cup black beans, drained and rinsed
- 1 teaspoon chili powder
- 1/2 teaspoon cumin
- Salt and pepper to taste
- Optional: salsa for topping
Instructions:
- Preheat Oven
Preheat your oven to 375°F (190°C). - Prepare the Peppers
Cut the tops off the bell peppers and remove the seeds. Place them upright in a baking dish. - Mix the Filling
In a bowl, combine the cooked rice, black beans, 1/2 cup cheddar cheese, chili powder, cumin, salt, and pepper. - Stuff and Bake
Fill each pepper with the rice mixture and top with the remaining cheddar cheese. Cover the dish with foil and bake for 30 minutes. Remove the foil and bake for an additional 10 minutes until the cheese is melted and bubbly. - Serve
Top with salsa if desired, and enjoy this colorful and cheesy dish! ️
By trying out these delicious cheese recipes homemade, you can create comforting and flavorful dishes that everyone will love. Each recipe showcases the versatility of cheese, making it a delightful ingredient in your cooking repertoire. Happy cheese-making! ✨
Tips for Perfecting Your Cheese Recipes
Perfecting your cheese recipes homemade is a delightful journey that combines art and science. Whether you’re a novice or a seasoned cheese maker, implementing a few tips can elevate your creations to a whole new level. In this section, we’ll explore essential techniques and tricks to ensure your homemade cheeses are flavorful, creamy, and just plain perfect! Let’s dive in and discover how to enhance your cheese-making skills. ✨
Choose Quality Ingredients
Ingredients:- High-quality milk (preferably whole or raw)
- Fresh herbs and spices for flavoring
- Quality salts (like kosher or sea salt)
Using fresh, high-quality ingredients is vital in cheese-making. Start with the best milk you can find, as it directly affects the flavor and texture of your cheese. Opt for local, organic milk if possible. Additionally, using fresh herbs and quality salts can enhance the overall taste of your cheese.
Maintain Temperature Control
Steps:- Invest in a reliable thermometer.
- Monitor temperature closely during heating and cooling.
Temperature control is crucial for successful cheese-making. Too high a temperature can lead to curdling or scorching, while too low can result in insufficient curd development. Use a reliable thermometer to monitor the milk’s temperature accurately. Maintain a steady heat and follow the recipe closely to achieve the desired texture.
Practice Patience
Steps:- Allow curds to sit undisturbed.
- Follow resting times as specified in recipes.
Cheese-making requires patience, as each step needs time for optimal results. After adding the acid to the milk, let the curds rest undisturbed. This resting period allows the curds to form properly and enhances the cheese’s flavor. Don’t rush the process; quality cheese takes time!
Experiment with Flavors
Ingredients:- Various herbs (e.g., rosemary, thyme)
- Spices (e.g., paprika, chili powder)
- Additional ingredients (e.g., sun-dried tomatoes, olives)
One of the joys of making cheese at home is experimenting with different flavors. Feel free to add herbs, spices, or other ingredients to customize your cheese. For instance, mixing fresh herbs into ricotta or adding garlic to cream cheese can create unique and delightful flavors. Don’t hesitate to get creative and find combinations that suit your taste!
Properly Store Your Cheese
Steps:- Wrap cheese in parchment paper or cheese paper.
- Store in an airtight container in the fridge.
After making your cheese, proper storage is essential to maintain its quality. Wrap the cheese in parchment paper or cheese paper, as it allows the cheese to breathe while preventing excess moisture. Store it in an airtight container in the refrigerator to keep it fresh for longer. Label your cheese with the date to track freshness easily.
Join a Cheese-Making Community
Steps:- Participate in local cheese-making classes or workshops.
- Join online cheese-making forums or social media groups.
Connecting with other cheese enthusiasts can provide valuable insights and tips. Consider joining local cheese-making classes or workshops to learn from experienced makers. Online forums and social media groups can also be great places to share experiences, ask questions, and discover new recipes. Engaging with a community can inspire and motivate you on your cheese-making journey! ❤️
By implementing these tips for perfecting your cheese recipes homemade, you can enhance your cheese-making skills and create delicious, artisanal cheeses in your own kitchen. Embrace the process, experiment with flavors, and enjoy the satisfaction of crafting your very own cheesy creations. Happy cheese-making! ✨
Storing and Aging Homemade Cheese
Storing and aging homemade cheese is a crucial step in ensuring your creations reach their full flavor potential. Proper storage techniques can preserve the quality and taste of your cheese, allowing it to develop unique characteristics over time. In this section, we’ll explore effective methods for storing and aging your homemade cheese recipes. With a little care and attention, you can enjoy your delicious cheesy creations for weeks or even months! ✨
1. Understanding the Basics of Cheese Storage
Key Points:
- Choose the right environment.
- Maintain appropriate humidity and temperature levels.
When storing cheese, the environment is key. Ideally, cheese should be stored in a cool, dark place with consistent temperature and humidity levels. A refrigerator is usually suitable for most cheeses, but for certain types, a cheese cave or a wine fridge can provide the optimal conditions. Aim for a temperature between 35°F and 45°F (1°C to 7°C) with humidity levels around 80% to keep the cheese fresh.
2. Wrapping Your Cheese Correctly
Materials Needed:
- Parchment paper or cheese paper
- Plastic wrap or wax paper
- Airtight containers
Wrapping your cheese properly is essential to maintain its quality. Start by wrapping it in parchment paper or cheese paper, as these materials allow the cheese to breathe while preventing excess moisture buildup. After wrapping, place the cheese in an airtight container or seal it with plastic wrap for added protection against odors and contaminants in the fridge. This method helps preserve the flavor and texture of your cheese. ️
3. Aging Cheese at Home
Ingredients:
- Cheese (e.g., cheddar, gouda)
- Salt (for brining)
- Optional: herbs and spices for flavoring
Aging cheese can develop complex flavors and textures. Here’s a simple step-by-step guide to age your homemade cheese:
Steps:
- Brining the Cheese:
Prepare a brine solution by dissolving salt in water (about 1 cup of salt per gallon of water). Submerge the cheese in the brine for 12 to 24 hours, depending on the cheese type. This step adds flavor and helps with preservation. - Drying the Cheese:
After brining, remove the cheese and pat it dry with a clean cloth. Allow it to dry for a few hours on a wire rack. This forms a protective rind, which is essential for aging. - Aging Process:
Place the cheese in a cheese aging container or a dedicated cheese fridge. Turn the cheese every few days to ensure even aging. Monitor the temperature and humidity to maintain the ideal conditions. - Aging Duration:
Depending on the cheese type, aging can take anywhere from a few weeks to several months. Taste periodically to see how the flavors develop. Once it reaches your desired taste, it’s ready to enjoy! ⏳
4. Monitoring and Maintaining Your Cheese
Steps:
- Check for signs of spoilage or mold.
- Keep the cheese clean and dry.
Regularly monitoring your aging cheese is vital to ensure it remains in good condition. Check for any signs of spoilage, such as off smells, excessive moisture, or unwanted mold. If you spot mold, you can often cut it off, provided the rest of the cheese looks and smells good. Keeping your cheese clean and dry is essential for preventing spoilage and ensuring a flavorful final product.
By mastering the techniques of storing and aging your cheese recipes homemade, you can create a wide variety of delicious cheeses that develop unique flavors over time. Whether you prefer creamy brie or sharp cheddar, proper care and attention will allow you to enjoy your cheesy creations to their fullest. So, gather your tools and ingredients, and start aging your homemade cheese today!
The Ultimate Guide to Cheese Recipes Homemade: Simple Steps for Perfect Cheesy Creations